http://www.homofaciens.de/technics-machines-plotter-cdrom_en_navion.htm
http://makezine.com/2015/07/20/build-drawbot-two-cd-drives-raspberry-pi/
Plotter CDROM
The video about the plotter
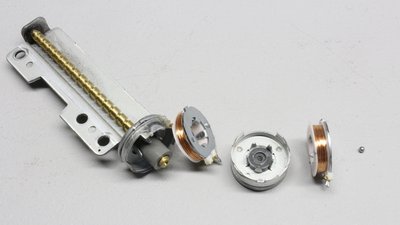
Mechanics
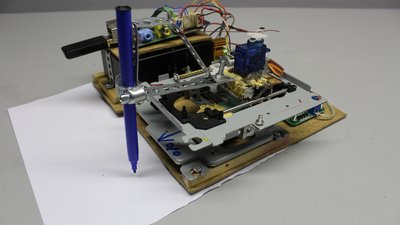
The battery powered WLAN plotter shown here is composed of parts from two old optical drives, four H bridges, a servo and a Raspberry Pi.
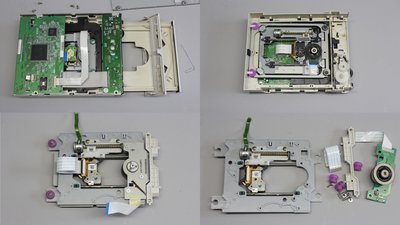
From the optical drives we need the mechanisms used to move the laser unit. That carriage is driven by a stepper motor. Unfortunately not all optical drives use a stepper motor to actuate the laser unit - my hit rate was 2 to 1.
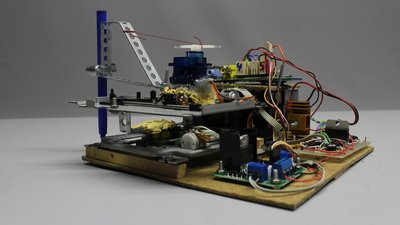
I have connected both mechanisms perpendicularly to each other with a stripe of perforated metal and some epoxy.
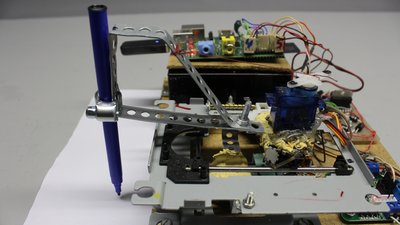
The pen holder is also made of a perforated metal stripe glued at the upper laser head. A servo is used to bend that metal stripe and so to lift or lower the pen.
Electronics
The stepper motor has four pins:
A pair of pins is internally connected to an electromagnetic coil. With a multimeter switched to continuity you can figure out which pairs are connected to a coil.
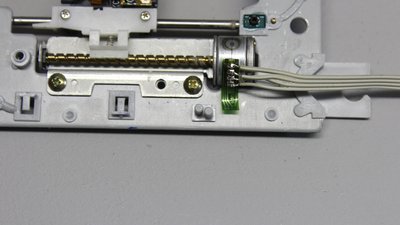
Don't remove the foil at the pins, because you will very likely also rip the copper wires off the pins by what the motor gets inevitably destroyed!
The old supply lines with the foil can be trimmed.
The new cabling has to be soldered to the pins.
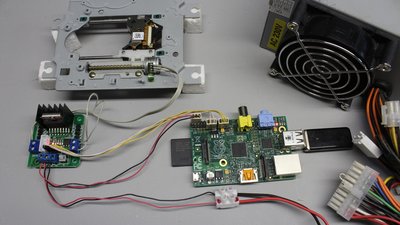
The board has four output terminals:
Each pair of outputs has to be connected to one of the coils at the stepper motor. Furthermore there are four input pins which have to be connected to the GPIOs of the Raspberry Pi. Finally the 5V supply voltage has to be connected to the terminals "Ground" and "VCC" which is the positive terminal of the supply voltage.
A single coil of the motor draws a current of almost 500mA, which is above the maximum current provided by the 5V pin of the Raspberry Pi!
Consequently you should use an old computer power supply or a battery to provide the electric energy needed to operate the mechanism.
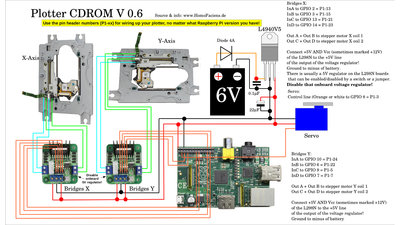
Schematic of the WLAN plotter.
Software
The software runs in command mode, thus you can login through ssh to operate the WLAN plotter. You can find the source code at the column Download.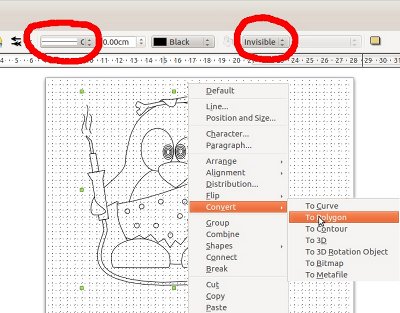
The software can compute bitmaps (*.bmp) with a resolution of 55 x 55 pixels and a color depth of 24 bits. Any other type of bitmap will be ignored. Pixel with a red blue or green component less than 200 are treated as "black" and will be drawn. All other pixels are treated as "white" and are skipped.
The supported vector format is "Scalable Vector Graphics (*.svg)" with some special things to note:
No areas are drawn, only their outlines. All paths (also the outlines of an area) must be set to "Polygon". I have tested the functionality with graphics edited and exported as svg by Libre Office Draw.
Have fun!
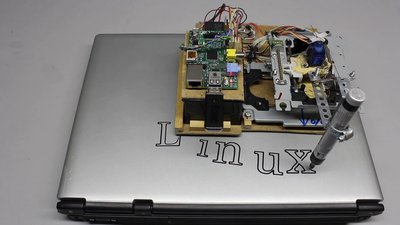
With the special design of the plotter you can use a waterresistant pen to draw on nearly any plain surface. The area covered by the pen is approximately 35 times 35 millimeters. 250 steps are needed to move the pen for 35 millimeters.
The lettering shown here is clearly larger than the area covered by the plotter. After drawing one of the characters, the whole plotter is moved manually to the right.
No hay comentarios:
Publicar un comentario