https://circuits4you.com/2017/12/09/thingspeak-esp8266/
Thing Speak ESP8266
ThingSpeak™ is an IoT analytics cloud
platform service that allows you to aggregate, visualize and analyze
live data streams in the cloud. ThingSpeak provides instant visualizations of data posted by ESP8266 to ThingSpeak. ThingSpeak is often used for prototyping and proof of concept IoT systems that require analytics.
In this tutorial, We will learn following thinds- How to Configuring ThingSpeak Cloud server Account ?
- How to program ESP8266 to upload sensor data ?
Lets understand the cloud concept first. Uploading of ESP8266 sensor data is done using Internet. It is three step process.
- Connect to your WiFi hot spot having internet access.
- Read Sensor data
- Upload data to ThingSpeak
Step 1: Sign up ThingSpeak
Its simple just enter your email id and verify your account.Step 2: Configuring ThingSpeak
Configuration is just few clicks jobStep 2.1: Create New Channel
Click on New Channel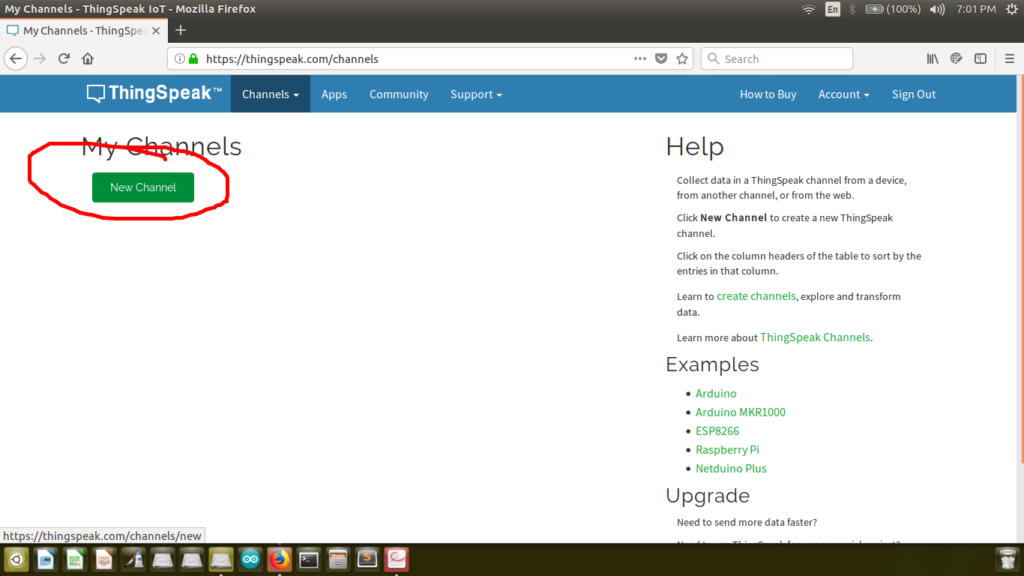
Enter Name and Field. You may have multiple Fields depending on number of sensor create multiple fields such as Light, Temperature, Humidity, etc.
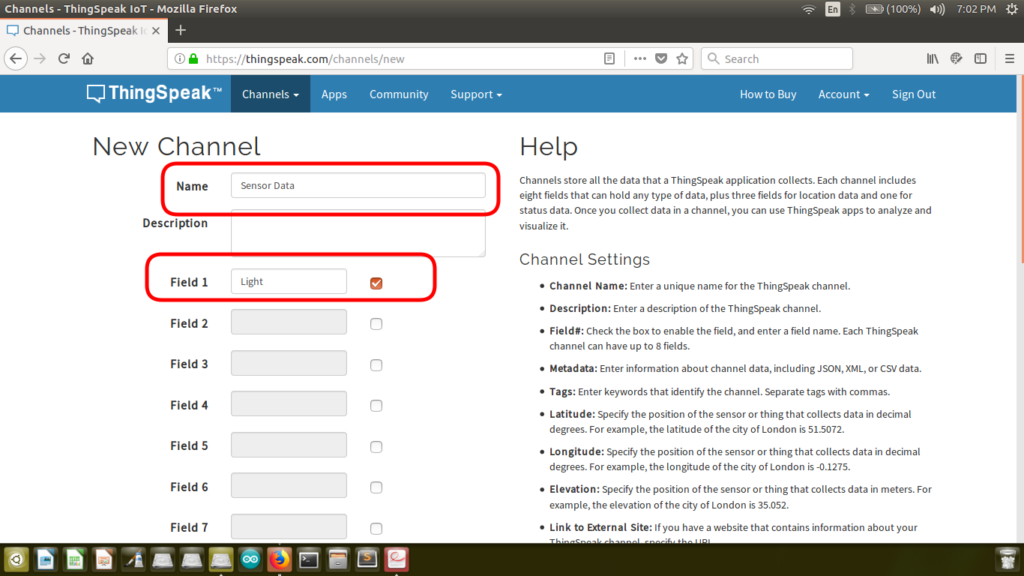
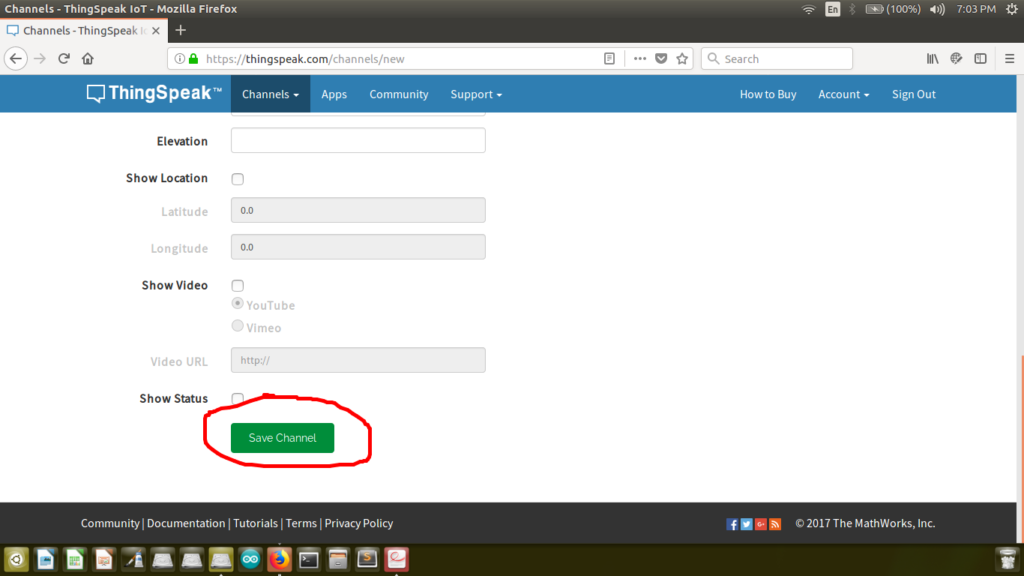
Keep everything else as it is. Blank or default values. and click on Save Channel.
Step 2.2: Getting API Key
Click on API Key Tab and look for these two fields Write Api Key and Update channel feed line.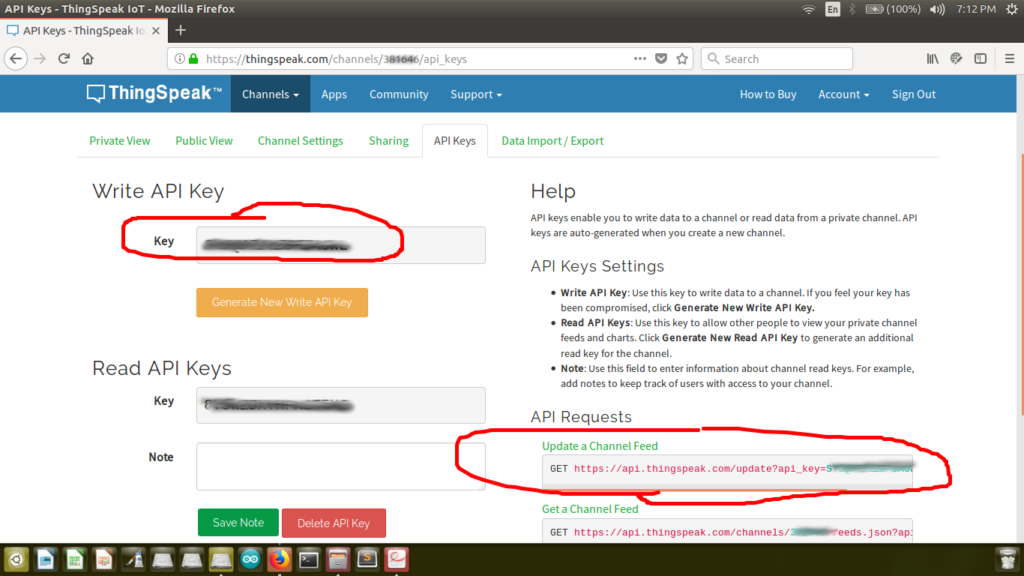
This line is important for data upload to cloud server
value in front of field1=0 is your sensor data for example if your adc value is 1234 then you call this GET request with https://api.thingspeak.com/update?api_key=yourapikey&field1=1234
For multiple sensors you need to add multiple fields as shown in below example
https://api.thingspeak.com/update?api_key=yourapikey&field1=1234&field2=442
Step 3: Programming ESP8266 to upload data to ThingSpeak cloud server
Make Changes in program for API KEY, SSID and PASSWORD
Upload Program and Open Serial monitor
with baud rate of 115200. First it will show connection status to your
wifi router then It uploads data to server and displays response from
server. Do not try to upload data at very high rate ThingSpeak server
will simply blocks it. 5 Seconds update time is okay.

Step 4: Check Data on ThingSpeak Server
Open Your ThingSpeak Account and Click on Private View of Your Channel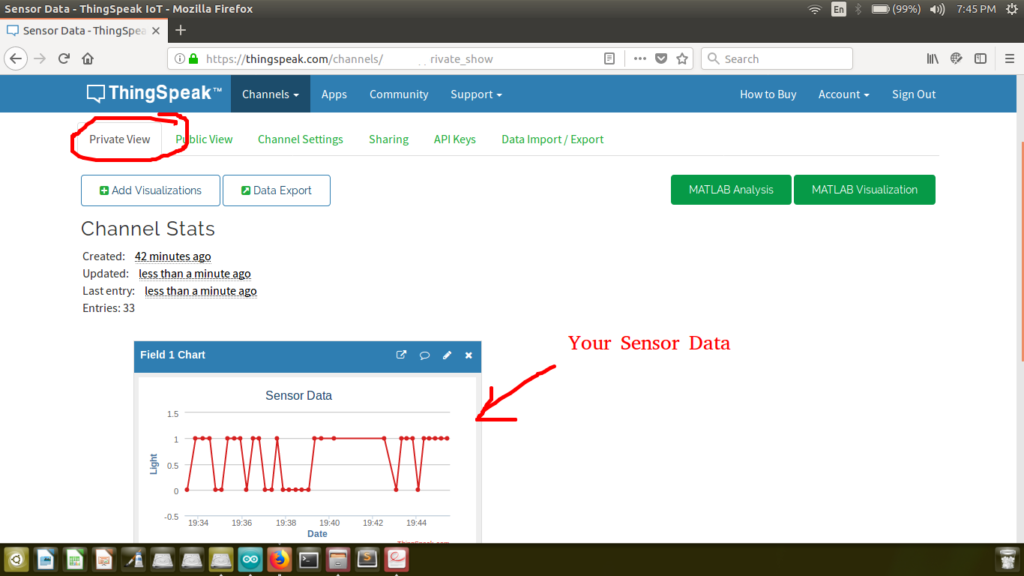
You did it well….Thats it….You can Create multiple Fields and Upload multiple sensor data. and also you can create multiple channels for multiple Data Nodes.
In case of any problem upload your project on Steps2Make.com to hear from me.
No hay comentarios:
Publicar un comentario