Install phpmyadmin in Debian 10, enable backports repository
https://www.pragmaticlinux.com/2020/12/install-phpmyadmin-on-debian-10-buster/
Enable the Debian 10 backports repository
When you attempt to install the phpMyAdmin package the usual way, something unexpected happens:
sudo apt install phpmyadmin
The package manager reports that package phpMyAdmin is not available in Debian 10 and can therefore not be installed:
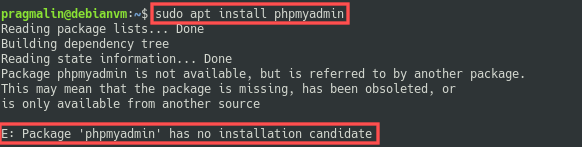
This surprised me. As a next step, I searched for the phpMyAdmin package on the Debian website. It turns out the Debian package repository includes phpMyAdmin for Debian 9 “stretch” and also for the upcoming Debian 11 “bullseye”, which is planned for release in 2021. This makes me think that phpMyAdmin must have had a bug or security issue that was not resolved at the release date of Debian 10 “buster”.
Luckily, the Debian 10 backports repository does include package phpMyAdmin. This means that we can simply install phpMyAdmin from the Debian 10 backports repository. Still easier and better than installing from source code. We just need to enable the Debian 10 backports repository first.
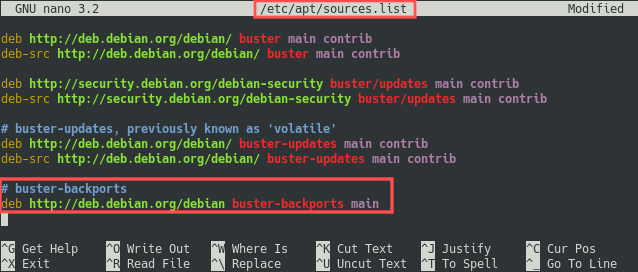
Go ahead and open the /etc/apt/sources.list file in the Nano text editor:
sudo nano /etc/apt/sources.list
Next, enter the backports repository towards the end of this file by adding this line:
deb http://deb.debian.org/debian buster-backports main
Install phpMyAdmin from the Debian 10 backports repository
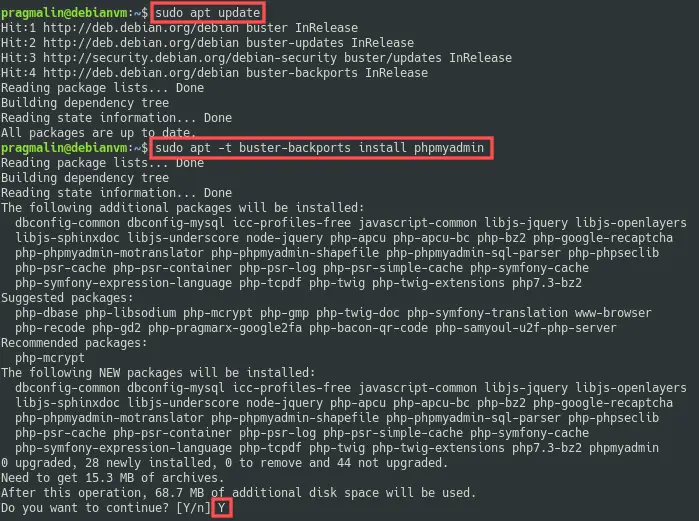
After making the backports repository available, we can install phpMyAdmin with the following commands:
sudo apt update
sudo apt -t buster-backports install phpmyadmin
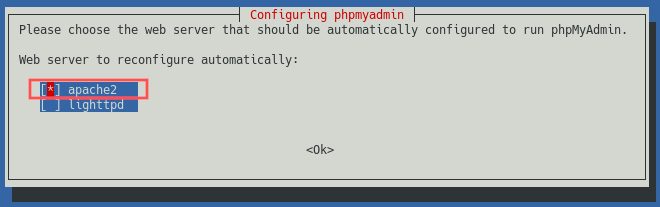
The phpMyAdmin package installer prompts you with a few questions. When asked which web server to configure automatically, select apache2 by pressing Space, followed by Enter to confirm:
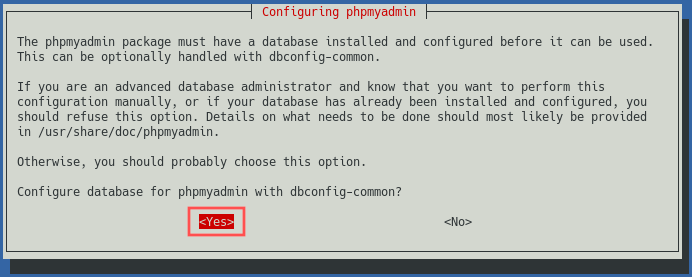
Following this, the phpMyAdmin package installer asks if you want to configure the database for phpMyAdmin with dbconfig-common. Select Yes by pressing the Enter key:
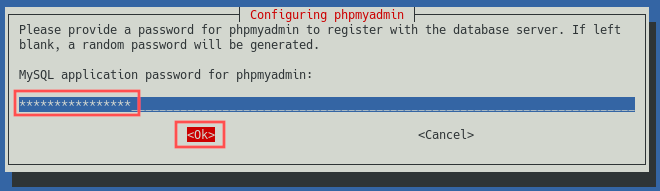
On the next screen, you can enter a password for the phpmyadmin MySQL user that the installer creates. Later on we’ll grant all available MySQL privileges to this phpmyadmin user, so make sure to enter a strong password. You can generate such a password with online tools such as this password generator. Once you entered the password, continue by pressing the Tab key to select the Ok button. Followed by pressing the Enter key to confirm:
Once the installer completes, finish up by restarting the Apache HTTP server:
sudo systemctl restart apache2
No hay comentarios:
Publicar un comentario